Cooking dry-aged meat is an art that, when mastered, can elevate your culinary skills to new heights. Dry aging is a process that enhances the flavor and tenderness of meat, particularly beef, by allowing it to age in a controlled environment. This guide will walk you through the steps to cook dry-aged meat perfectly, ensuring a mouthwatering and memorable dining experience.
Understanding Dry-Aged Meat
Before diving into the cooking process, it’s essential to understand what dry aging is and why it’s so special. Dry aging involves hanging meat in a temperature-controlled environment for several weeks to months. During this time, the meat’s natural enzymes break down the muscle tissue, making it more tender. The meat loses moisture, concentrating its flavors and developing a unique, nutty, and rich taste.
Choosing the Right Cut
Not all cuts of meat are suitable for dry aging. The most common cuts for dry aging are:
- Ribeye: Known for its marbling and rich flavor, it is a popular choice for dry aging.
- Strip Loin (New York Strip): This cut has a good balance of tenderness and flavor, making it an excellent candidate for dry aging.
- T-Bone: A T-bone steak includes both strip loin and tenderloin, offering a variety of textures and flavors.
- Porterhouse: Similar to the T-bone but with a larger portion of tenderloin, the porterhouse is a luxurious choice for dry-aging.
How Long Can Deli Meat Sit Out?
Preparing Dry-Aged Meat for Cooking
Once you have your dry-aged meat, follow these steps to prepare it for cooking:
- Trimming: Dry-aged meat develops a crust or “bark” during the aging process. This bark is safe to eat but can be tough. Trim it off using a sharp knife, leaving a thin layer of fat for flavor.
- Bring to Room Temperature: Allow the meat to sit at room temperature for about an hour before cooking. This helps it cook more evenly.
- Seasoning: Dry-aged meat has a robust flavor, so you don’t need much seasoning. A generous pinch of salt and freshly ground black pepper is usually sufficient. Some chefs also add a sprinkle of garlic powder or dried herbs like thyme and rosemary.
Cooking Methods
There are several methods to cook dry-aged meat, each with its advantages. Here are three popular techniques:
- Pan-Seared and Oven-Finished This method combines the best of both worlds: a crispy crust from pan-searing and even cooking from the oven.
- Step 1: Preheat your oven to 400°F (200°C).
- Step 2: Heat a cast-iron skillet or heavy-bottomed pan over high heat until it’s smoking hot. Add a small amount of high-smoke-point oil, like grapeseed or canola oil.
- Step 3: Sear the meat on all sides for about 2-3 minutes per side, until a beautiful crust forms.
- Step 4: Transfer the skillet to the preheated oven and cook the meat to your desired doneness. Use a meat thermometer to monitor the internal temperature (see temperature guide below).
- Step 5: Remove the meat from the oven and let it rest for 10-15 minutes before slicing.
- Grilling Grilling gives dry-aged meat a smoky flavor and beautiful grill marks.
- Step 1: Preheat your grill to high heat.
- Step 2: Lightly oil the grill grates to prevent the meat from sticking.
- Step 3: Grill the meat for about 4-5 minutes per side for medium-rare, or until it reaches your desired doneness.
- Step 4: Let the meat rest for 10-15 minutes before slicing.
- Sous Vide Sous vide cooking involves sealing the meat in a vacuum-sealed bag and cooking it in a water bath at a precise temperature. This method ensures even cooking and tender results.
- Step 1: Preheat your sous vide machine to your desired temperature (see temperature guide below).
- Step 2: Season the meat and seal it in a vacuum-sealed bag.
- Step 3: Cook the meat in the water bath for the recommended time (usually 1-2 hours for steaks).
- Step 4: Remove the meat from the bag and pat it dry. Sear it quickly in a hot pan or on the grill to develop a crust.
- Step 5: Let the meat rest for 10-15 minutes before slicing.
Temperature Guide
Cooking meat to the right internal temperature is crucial for both safety and taste. Here’s a guide to help you achieve your desired doneness:
- Rare: 125°F (52°C)
- Medium-Rare: 135°F (57°C)
- Medium: 145°F (63°C)
- Medium-Well: 155°F (69°C)
- Well-Done: 165°F (74°C)
Resting the Meat
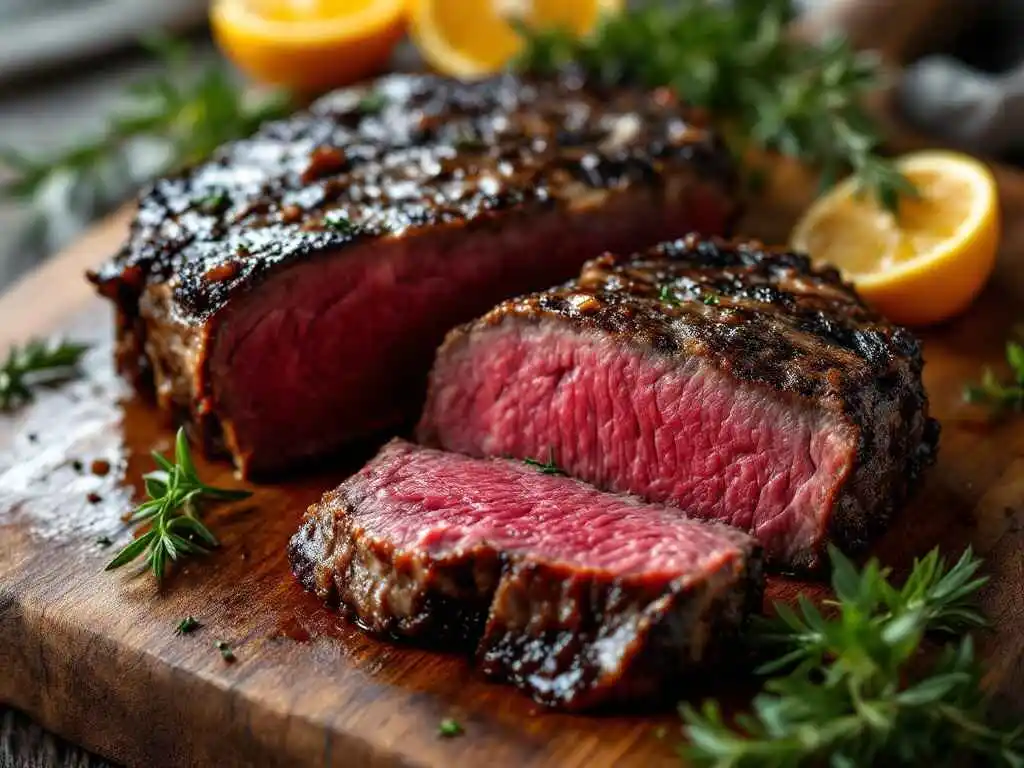
After cooking, it’s essential to let the meat rest. Resting allows the juices to redistribute throughout the meat, ensuring a juicy and flavorful steak. Place the meat on a cutting board and tent it loosely with foil. Let it rest for 10-15 minutes before slicing.
Slicing and Serving
When slicing dry-aged meat, always cut against the grain. This shortens the muscle fibers, making the meat more tender and easier to chew. Serve the sliced meat with your favorite sides, such as roasted vegetables, mashed potatoes, or a fresh salad.
Pairing Dry-Aged Meat with Wine
Dry-aged meat pairs beautifully with a variety of wines. Here are some recommendations:
- Red Wines: Cabernet Sauvignon, Malbec, Syrah, or a bold Bordeaux blend.
- White Wines: For those who prefer white wine, a full-bodied Chardonnay or a crisp Sauvignon Blanc can complement the rich flavors of dry-aged meat.
Storing Leftovers
If you have leftovers, store them in an airtight container in the refrigerator. Leftover dry-aged meat can be used in sandwiches, salads, or even as a topping for pizza. Reheat gently to avoid overcooking.
FAQs
Frequently Asked Questions About Cooking Dry-Aged Meat
Cooking dry-aged meat can be a bit intimidating, but with the right information, you can master this culinary art. Here are five frequently asked questions to help you get started:
1. What is Dry-Aged Meat?
Dry-aging is a process where meat, typically beef, is aged in a controlled environment for several weeks to months. During this time, the meat’s natural enzymes break down the muscle tissue, making it more tender. The meat also loses moisture, concentrating its flavors and developing a unique, rich taste.
2. Which Cuts of Meat Are Best for Dry-Aging?
The most common cuts for dry-aging are:
- Ribeye: Known for its marbling and rich flavor.
- Strip Loin (New York Strip): Offers a good balance of tenderness and flavor.
- T-Bone: Includes both strip loin and tenderloin.
- Porterhouse: Similar to the T-bone but with a larger portion of tenderloin.
3. How Do I Prepare Dry-Aged Meat for Cooking?
To prepare dry-aged meat for cooking:
- Trimming: Remove the tough outer crust or “bark” that develops during aging.
- Bring to Room Temperature: Let the meat sit at room temperature for about an hour before cooking.
- Seasoning: Use a generous pinch of salt and freshly ground black pepper. You can also add garlic powder or dried herbs like thyme and rosemary.
4. What Are the Best Cooking Methods for Dry-Aged Meat?
There are several methods to cook dry-aged meat:
- Pan-Seared and Oven-Finished: Sear the meat in a hot pan, then finish cooking in the oven.
- Grilling: Grill the meat for a smoky flavor and beautiful grill marks.
- Sous Vide: Cook the meat in a vacuum-sealed bag in a water bath at a precise temperature, then sear it quickly for a crust.
5. How Do I Know When Dry-Aged Meat is Cooked to Perfection?
Use a meat thermometer to monitor the internal temperature:
- Rare: 125°F (52°C)
- Medium-Rare: 135°F (57°C)
- Medium: 145°F (63°C)
- Medium-Well: 155°F (69°C)
- Well-Done: 165°F (74°C)
After cooking, let the meat rest for 10-15 minutes before slicing to allow the juices to redistribute.